RV driving presents unique challenges due to vehicle size and blind spots. To mitigate these risks, a wireless backup camera can significantly enhance safety for RVs, motorhomes, and camper vans. This guide to installing a high quality wireless backup camera on your RV for enhancing safety provides detailed steps for installing a backup camera, emphasizing its role in improving visibility and maneuverability. Additionally, such cameras allow for precise parking and reversing, minimizing accidents. Furthermore, the wireless setup offers flexibility and ease of use, making it an ideal choice for enhancing RV safety. Let’s explore how to equip your RV with this essential safety tool, ensuring smooth and secure travels on the road.
Why Install a High Quality Wireless Backup Camera in Your RV?
The installation of a high quality RV wireless backup camera is a game-changer for safety. These cameras significantly reduce the challenges associated with maneuvering large vehicles like RVs and motorhomes, providing crucial visibility for safe travel. A high quality wireless backup camera system enhances comfort, convenience, and peace of mind, reducing the risk of accidents and injuries.
Enhancing Safety During Maneuvers
Driving an RV presents unique challenges, especially when reversing or parking. The sheer size and lack of rear visibility make it difficult to see behind. A wireless backup camera directly addresses this issue, reducing blind spots and making maneuvering a breeze. Additionally, this system helps drivers navigate tight spaces and avoid obstacles, such as curbs and posts, which are common in RV parking.
Prevention of Accidents and Injuries
A backup camera is instrumental in preventing accidents and injuries. Reversing and parking mishaps account for a significant portion of RV-related incidents, including damage to the vehicle, other cars, and property. According to statistics, backup accidents can lead to costly repairs and insurance claims. The camera’s visual aid minimizes the risk of these accidents, ensuring the safety of passengers and those around the vehicle.
Increased Convenience and Peace of Mind
A wireless backup camera not only improves safety but also boosts convenience. Drivers can confidently reverse and park without worrying about potential hazards. This added confidence brings peace of mind, allowing RV owners to focus on enjoying their travels. Furthermore, the wireless system makes it easier to set up, providing flexibility for those constantly on the move.
Overall, installing a wireless backup camera on an RV greatly benefits both safety and convenience. By reducing blind spots and minimizing accident risks, this system is essential for a stress-free driving experience.
Choosing the Right High Quality Wireless Backup Camera for Your RV
Selecting the right high quality wireless backup camera is crucial for enhancing RV safety. Several factors influence this decision, including key features, types of cameras, and their pros and cons. It’s essential to choose a camera that suits both your RV’s needs and your travel lifestyle.
Key Features to Consider
A backup camera’s resolution and night vision capabilities are critical factors. High-resolution cameras provide clearer visuals, aiding navigation. Night vision capabilities ensure safety during evening travels, reducing risks in low-light conditions. Furthermore, a camera’s field of view, water resistance, and durability ensure reliable performance in various weather conditions, crucial for an RV’s versatile lifestyle.
Types of Wireless Backup Cameras
Several models of wireless backup cameras are available, each with unique advantages. Solar-powered cameras are eco-friendly, requiring no additional power source, while Bluetooth-enabled models offer seamless integration with other RV electronics. However, each type has its drawbacks, with solar-powered cameras needing ample sunlight, and Bluetooth cameras potentially facing connectivity issues.
Choosing the right camera model depends on your RV setup and maintenance preferences. Some cameras require regular checks, while others are more self-sufficient, providing uninterrupted service.
A wireless backup camera system is a valuable addition to any RV, enhancing safety and convenience. By carefully considering the camera’s features and type, you can make an informed decision, ensuring a reliable and functional setup for your travels.
Installing a high-quality wireless backup camera on your RV is essential for safety and convenience. By reducing blind spots and improving maneuverability, it minimizes accident risks, providing peace of mind for travelers. Furthermore, choosing the right camera with key features ensures a seamless installation, enhancing your RV experience. Let’s embrace this technological advancement, ensuring smooth and secure travels on the road.
Step-by-Step Installation Process for a High-Quality RV Wireless Backup Camera
Installing a high-quality wireless backup camera on your RV is crucial for enhancing safety and convenience. This guide provides a comprehensive step-by-step process, ensuring a seamless installation. Let’s explore how to equip your RV with this essential safety tool, taking it from preparation to completion.
Step 1: Preparation
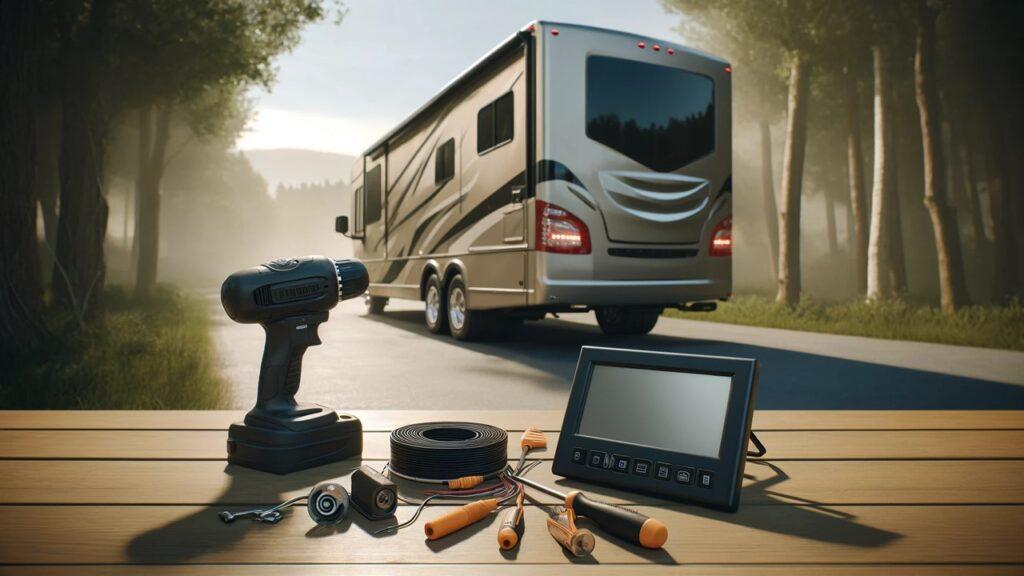
Before starting the installation process, gather all the necessary tools and components. This includes a high-quality wireless backup camera system, a drill, screws, and RV mechanics tool sets. It’s important to choose a camera that’s compatible with your RV’s electrical system and offers features like night vision and a wide field of view. Next, choose the camera’s location, ensuring it provides a clear view of the vehicle’s rear. Moreover, ensure the spot is accessible for mounting and wiring, avoiding potential obstacles.
Step 2: Mounting the Camera
Begin by carefully drilling holes into the RV’s rear, aligning them with the camera mount. Securely attach the camera using screws, making sure it sits firmly in place. Ensure the camera has a clear line of sight, free from obstructions like ladders or spare tires. Furthermore, check for any potential interference from nearby electronics or metal surfaces that could impact the camera’s wireless connection. Make sure the camera is positioned at an angle that captures a wide field of view, minimizing blind spots.
Step 3: Routing the Wires
Next, route the camera’s power and data cables to the RV’s interior. This step might require drilling additional holes or utilizing existing openings. Carefully run the wires through, avoiding sharp edges or potential damage points. Secure the cables with clips or ties to prevent tangling, ensuring a clean setup. Additionally, check the routing path to avoid placing wires near heat sources or moving parts, which could damage them.
Step 4: Installing the Monitor
Inside the RV, mount the camera’s monitor on the dashboard or another visible spot. Connect it to the RV’s power source, following the manufacturer’s instructions. Pair the monitor with the camera, ensuring a stable connection. Furthermore, adjust the monitor’s settings, such as brightness and contrast, for optimal viewing in various lighting conditions. Make sure the monitor is securely mounted to prevent shifting while driving.
Step 5: Testing the System
Once installed, test the entire backup camera system. Check the monitor’s display to ensure it shows a clear image of the vehicle’s rear. Additionally, verify the wireless connection’s stability, ensuring smooth visuals. If any issues arise, troubleshoot them promptly. For power-related concerns, check the connections and fuses. For signal interference, reposition the camera or monitor and consider RV wifi boosters if necessary.
Step 6: Final Adjustments
After successful testing, make final adjustments to the camera and monitor. Ensure the camera is positioned at the right angle, providing a comprehensive view. Adjust the monitor’s settings as needed, optimizing its performance for varying lighting conditions. Moreover, consider adding RV converters chargers or RV solar generators to ensure a reliable power source for the camera system, especially during extended trips.
The installation process for a high-quality wireless backup camera on an RV is comprehensive but straightforward. By following these steps, you can equip your RV with an essential safety tool, enhancing your travel experience. Ensure to check the system periodically, maintaining its functionality, and enjoy safe travels on the road.
Installing a wireless backup camera on your RV is essential for enhancing safety and convenience. The comprehensive step-by-step process ensures a seamless installation, reducing risks and providing peace of mind. Embrace this technological advancement, equipping your RV with a backup camera, and enjoy safe, smooth travels.
Troubleshooting Common Installation Issues
Installing a wireless backup camera on your RV can bring immense safety benefits, but issues may arise during or after installation. This section highlights common problems and solutions, ensuring your backup camera functions smoothly and reliably.
Wireless Signal Interference Problems
Signal interference is a common issue in RV environments, often due to the numerous electronic devices present. Metal surfaces, dense foliage, or nearby vehicles can disrupt the wireless connection, leading to flickering or loss of signal. To enhance signal strength and reliability, ensure the camera and monitor have a clear line of sight. Additionally, consider installing RV wifi boosters to strengthen the signal. Positioning the camera away from metal surfaces and minimizing electronic interference also improves connection quality.
Power Connectivity Concerns
Power connectivity issues can also affect your backup camera’s functionality. To ensure stable connections, regularly check wiring and connections for fraying or damage. Securely connect the camera and monitor to the RV’s power source, avoiding overloaded circuits. If power-related issues persist, troubleshoot by inspecting fuses and ensuring proper voltage output. Alternatively, consider installing RV converters chargers or RV solar generators to maintain a reliable power source for the camera system.
Overall, addressing these common issues enhances the backup camera’s reliability, ensuring safe and smooth travels.
Maintenance and Care for Your RV’s Backup Camera
Maintaining your RV’s wireless backup camera is essential for its long-term functionality. Regular maintenance tasks and long-term care strategies can extend the camera’s lifespan, ensuring it continues to serve as a vital safety tool.
Regular Maintenance Tasks
Routine checks are crucial for maintaining camera clarity and functionality. Clean the camera lens regularly, removing dirt, dust, or moisture that may obstruct the view. Check the wiring and connections, ensuring they remain intact and free from wear. Additionally, run periodic tests to ensure the camera and monitor pair seamlessly, addressing any issues promptly.
Long-Term Care Strategies
To extend the life of your backup camera system, adopt proactive care strategies. Keep the camera sheltered from harsh weather when not in use, such as parking under an RV awning or in a garage. Consider adding a cover or housing to protect the camera from rain or snow. Additionally, regular firmware updates from the manufacturer can enhance the camera’s performance, addressing potential bugs or issues.
Maintaining and caring for your RV’s backup camera system is essential for its longevity. By implementing these strategies, you can ensure it continues to provide reliable service, enhancing your RV experience.
Troubleshooting and maintenance are vital for ensuring your RV’s backup camera functions effectively. Addressing signal interference and power connectivity issues improves the camera’s reliability, while regular maintenance and care strategies extend its lifespan. Equip your RV with these safety measures, ensuring smooth and secure travels for years to come.
Tips for Enhancing Backup Camera Utility
A backup camera provides invaluable assistance when maneuvering an RV, but its utility can be further enhanced by integrating it with other safety systems and upgrading its functionality. This section explores how to maximize the benefits of a backup camera system.
Integrating with Other RV Safety Systems
To achieve comprehensive coverage, connect your backup camera with other monitoring systems. RV wifi boosters can help maintain a stable wireless connection, while systems like blind spot monitors, parking sensors, and dash cams provide an all-around view of the RV’s surroundings. Integration helps create a cohesive network, ensuring each component communicates effectively for seamless navigation. This synergy reduces risks, allowing you to maneuver confidently.
Furthermore, an integrated safety system offers enhanced situational awareness, minimizing the chances of accidents. The combination of visual and auditory aids provides drivers with real-time feedback, ensuring safe travels.
Upgrading Your Backup Camera System
To further enhance the functionality of an existing backup camera system, consider adding additional cameras. Side cameras, for instance, provide comprehensive coverage, reducing blind spots during lane changes. Furthermore, front cameras can assist in tight parking situations, minimizing the risk of collisions. Wireless systems make this integration seamless, avoiding complicated wiring and providing easy-to-use solutions.
Upgrading your backup camera system also involves considering software enhancements. Some cameras offer firmware updates, improving resolution and reducing lag. Ensure to check the manufacturer’s website for updates, keeping your system running smoothly.
Enhancing your backup camera’s utility ensures safe, comprehensive coverage for your RV. By integrating it with other safety systems and upgrading its functionality, you can confidently navigate the road ahead.
Wrapping It Up!
Installing a wireless backup camera on your RV is essential for enhancing safety and convenience. This camera reduces blind spots, minimizes accident risks, and ensures smooth travels, providing invaluable assistance when maneuvering an RV. Additionally, integrating the camera with other safety systems creates a cohesive network, while upgrades further enhance its utility.
It’s crucial to consider safety as a priority, with technological aids playing a key role in achieving it. Embrace advancements like backup cameras, integrated systems, and upgrades, ensuring secure navigation for your RV journeys. This comprehensive guide offers the steps needed to enhance your RV’s safety, allowing you to travel with peace of mind, embracing a safer and more enjoyable experience on the road.
Related FAQs
Can a Wireless Backup Camera Be Installed on Any RV?
Most RVs accommodate wireless backup cameras, but check compatibility for seamless integration.
Does a Wireless Backup Camera Work in Low Light?
High-quality cameras offer night vision capabilities, ensuring clear visuals in dim conditions.
What Is the Range of a Wireless Backup Camera System?
The range varies, but most systems cover 50-100 feet, suitable for RVs of all sizes.
How Do I Maintain My Backup Camera?
Regularly clean the lens, check wiring for damage, and update firmware to maintain functionality.
Is a Wireless Backup Camera Secure from Interference?
Interference can occur, but choosing a reliable system and proper installation minimizes risks.
As outdoor enthusiasts ourselves, we understand the significance of reliable gear that can withstand the elements and support you throughout your journey. We try to provide as much real life information with our guides and how tos to the readers as possible. Our honest and transparent reviews of essential outdoor gadgets and products are rooted in testing and experience. We take great satisfaction in offering unbiased evaluations, ensuring that you can make informed decisions when investing in outdoor gear. As an affiliate website, we may earn a small commission from some of the products we feature. However, rest assured that our opinions are not influenced by this, and your trust is always our top priority.