Are you gearing up for some RV fun this summer but not sure where to start? Let’s kick things off by tackling the essential process of dewinterizing your RV. In our guide, “11 Detailed Easy Steps to Dewinterize Your RV,” you’ll find everything you need to prepare your motorhome for the adventures that lie ahead. Dewinterizing isn’t just a chore; it’s your first step toward ensuring your camper van runs smoothly, keeping you safe and comfortable wherever the road takes you. Moreover, we’ll dive into why this process is crucial not only for maintenance but also for maximizing your RV’s longevity and performance. Furthermore, by the end of this guide, you’ll appreciate the undeniable benefits of a well-maintained travel trailer, ready to answer the call of the wild without a hitch.
Step-By-Step Guide
Embarking on your next adventure begins with preparing your RV for the road. This step-by-step guide provides clear, comprehensive instructions to ensure your motorhome is ready for action. Follow along as we cover everything from inspecting systems to refreshing essentials, making the process as smooth as your upcoming travels. Let’s dive in and get your RV primed for unforgettable experiences!
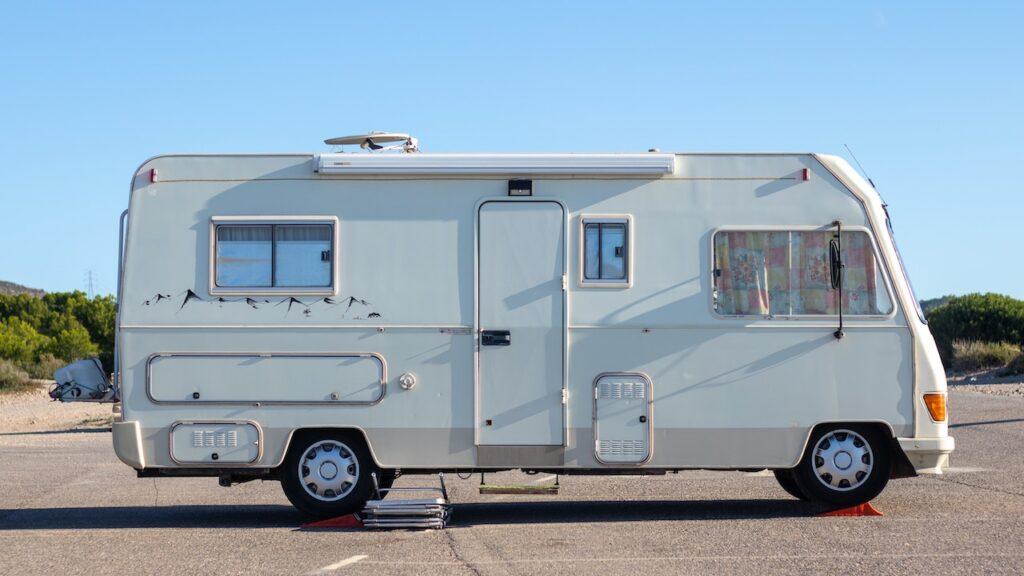
1. Inspecting and Cleaning the Exterior of Your RV
Before hitting the road for your next big adventure, it’s crucial to ensure your RV is in pristine condition, inside and out. Let’s start with the exterior, where the traces of winter can hide. Here’s how to give your motorhome a thorough post-winter evaluation and cleaning, setting the stage for safe and smooth travels.
Why Inspect the RV’s Exterior?
After months of storage, your RV may have been exposed to various elements that could lead to deterioration or damage. Inspecting the exterior of your RV is critical for catching issues early, potentially saving you from costly repairs down the road. Identifying potential problems early ensures you can address them before they worsen, maintaining the integrity and value of your camper van.
How to Clean Your RV’s Exterior Efficiently
Cleaning your RV might seem daunting, but with the right approach, it can be straightforward and effective. Here’s how to get your RV looking its best:
- Choose the Right Cleaning Products: Opt for cleaners specifically designed for RVs to avoid damaging the paint or finishes. Products like RV wash and wax are ideal.
- Start from the Top: Always clean from the roof down to prevent dirt from higher surfaces from soiling cleaned areas.
- Use Soft Brushes and Cloths: This will help you avoid scratches as you remove grime and dirt.
- Rinse Thoroughly: Ensure all soap is washed off to avoid residue build-up, which can damage surfaces over time.
Taking the time to thoroughly wash your RV not only maintains its appearance but also allows you to inspect the surface for any unseen damage more effectively.
Inspecting Seals and Slide-Outs
The seals and slide-outs of your RV are prone to wear and tear and require special attention during your inspection:
- Check Seals for Tightness and Wear: Inspect door and window seals for any cracks or gaps that could let water in. Use a seal conditioner to maintain elasticity.
- Lubricate Slide-Out Mechanisms: Ensure the slide-outs operate smoothly by cleaning
and lubricating their mechanisms. This helps prevent mechanical failures while you’re on the road.
Addressing these areas will ensure that your RV remains watertight and functional, protecting you and your interior from water damage and the elements.
After meticulously cleaning and inspecting the exterior of your RV, you’ll not only have a vehicle that looks great but one that’s also more reliable for your travels. Furthermore, this proactive maintenance helps preserve your RV’s value and ensures that you are ready to embark on your journey with confidence. Remember, the effort you put into your RV today ensures many more adventurous tomorrows.
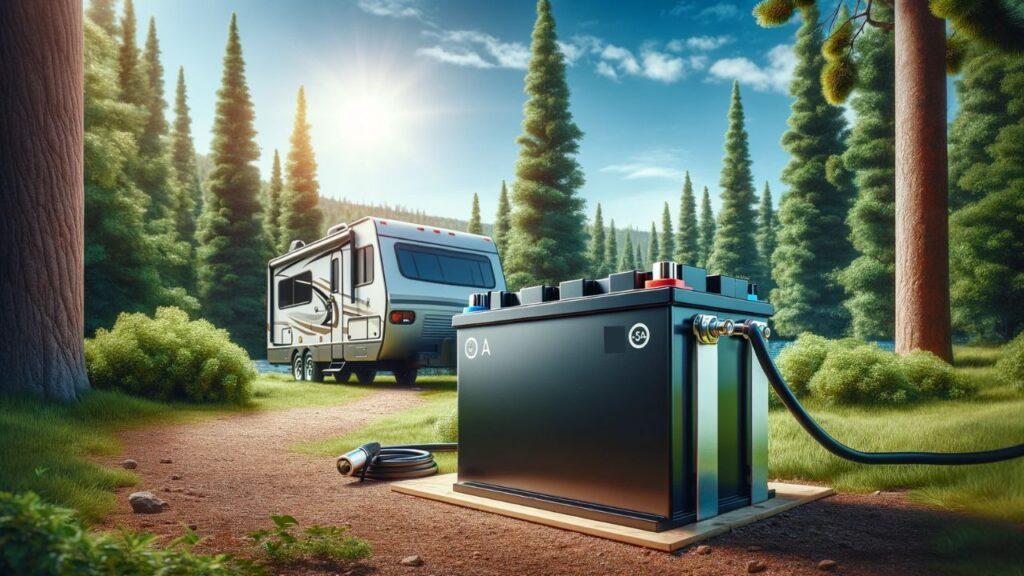
2. Checking and Reconnecting the RV Battery System
After a long winter, it’s essential to ensure that your RV’s battery system is fully operational to avoid any hitches on your upcoming trips. This section delves into the crucial steps of preparing, checking, and reconnecting your RV batteries, ensuring your motorhome is powered up and ready to go.
Preparing Your RV’s Battery After Winter
Starting with the RV battery, a thorough inspection after winter storage is crucial. Here’s how to ensure your battery is in top condition for your travels:
- Inspect the Battery for Visible Damage: Look for signs of wear, corrosion, or leakage.
- Test the Battery Charge Level: Use a voltmeter to check if the battery needs charging.
- Charge the Battery: Connect it to a battery charger. Ensure it reaches full capacity.
- Reinstall the Battery: Once fully charged, securely place the battery back in its compartment.
Taking these steps helps prevent surprises on the road, ensuring your RV’s electrical systems function flawlessly.
Safety Measures When Handling RV Batteries
Handling RV batteries requires caution and the right equipment to ensure safety and efficiency:
- Wear Protective Gear: Gloves and goggles protect against acid and sparks.
- Use the Correct Tools: Equip yourself with proper tools from your RV mechanics tool set.
- Avoid Short Circuits: Keep metal objects away from the battery terminals.
- Check Connections: Ensure all connections are tight and corrosion-free to avoid electrical failures.
These precautions are essential to maintaining safety while handling batteries, reducing the risk of accidents and damage.
Reconnecting Your RV’s Battery
Once your battery is inspected and charged, reconnecting it properly is vital for your RV’s operation:
- Clean Battery Terminals: Use a wire brush to clean off any corrosion.
- Connect the Positive Terminal First: This minimizes the risk of sparking.
- Secure the Negative Terminal: Complete the circuit by attaching the negative terminal.
- Test the System: Power on your RV to check if all systems are functioning.
Following these detailed steps ensures your RV’s battery is correctly and safely reconnected, ready to support all your on-the-road needs, from lighting to essential RV appliances.
By carefully preparing, checking, and reconnecting your RV’s battery system, you set the stage for reliable and worry-free travels. These steps are not just routine maintenance; they’re your assurance that your RV will perform optimally on every journey. Remember, a well-maintained battery system is the heartbeat of your RV, powering everything from simple lights to complex navigation systems. So, take the time to do it right, and you’ll enjoy uninterrupted adventures in your well-equipped home on wheels.
3. Refreshing the RV Water System
As the heart of your RV’s comfort and cleanliness, the water system deserves thorough attention after a long winter’s rest. Ensuring that this system is sanitized and functioning correctly is key to a successful and healthy trip. Let’s dive into the necessary steps to refresh your RV water system, making sure it’s safe and ready for your adventures.
How to Sanitize Your RV’s Water System
Sanitizing your RV’s water system is crucial before hitting the road. Here’s why and how to do it right:
- Understand the Importance: Sanitizing eliminates bacteria and mold that can build up in the system during storage.
- Choose the Right Sanitization Products: Use a product specifically designed for RVs, like RV drinking water hoses and safe sanitizing solutions.
- Follow Product Instructions: Mix and circulate the solution according to the manufacturer’s directions to ensure effective sanitization.
Taking these steps not only assures clean drinking water but also protects your health and enhances your RV experience.
Flushing the System
After sanitization, flushing out antifreeze and any lingering contaminants is next:
- Drain the Antifreeze: Empty all lines of non-toxic antifreeze used for winterization.
- Flush with Fresh Water: Run fresh water through the system to clean out residues.
- Check for Leaks and Hose Condition: Inspect all connections and hoses for leaks or wear. Replace or repair as necessary.
Properly flushing your system ensures that your water is fresh and your pipes are clear, ready for the journey ahead.
Preparing the Water Heater for Use
Getting your RV water heater ready is the final step in refreshing your water system:
- Inspect and Clean the Heater: Check for any sediment or debris. Clean the heating element if accessible.
- Test the Heater Before Filling: Make sure all connections are secure and that the heater is functional.
- Adjust Settings Accordingly: Set the temperature to a safe and comfortable level for use.
Following these steps guarantees that you’ll have hot water for showers and dishes, enhancing the comfort of your RV travels.
With a fully sanitized and operational water system, your RV is one step closer to being road-ready. Furthermore, these essential maintenance tasks not only ensure the functionality and longevity of your water system but also contribute to a safe and enjoyable RV adventure. Remember, a little preparation goes a long way in avoiding unexpected issues, letting you focus on making memorable experiences on the open road.
4. Reviewing and Updating RV Safety Devices
Safety should never be an afterthought, especially when it comes to your RV adventures. Ensuring that all safety devices are functional and up to date is paramount for protecting both your vehicle and your loved ones. Let’s go through the necessary checks and updates for your RV’s safety devices, so you can travel with peace of mind.
Why Check Your RV’s Safety Devices?
Your RV’s safety devices act as the first line of defense against potential emergencies. Here’s why it’s crucial to keep them in check:
- Protection is Key: Functional safety devices significantly reduce the risks of fire, gas leaks, and other hazards.
- Common Devices to Check: Regularly inspect smoke detectors, fire extinguishers, carbon monoxide detectors, and propane detectors.
Maintaining these devices is essential for a safe journey, ensuring they are ready to perform when needed.
Inspecting Fire Extinguishers and Smoke Detectors
Fire safety is critical in an enclosed space like an RV. Here’s how to ensure your fire extinguishers and smoke detectors are ready:
- Test Smoke Detectors Monthly: Press the test button to confirm they’re working correctly.
- Inspect Fire Extinguishers: Check for proper charge and ensure accessibility for quick response.
- Placement Tips: Install smoke detectors in living areas and near bedrooms; keep extinguishers near the kitchen and exit doors.
Properly functioning and strategically placed fire safety equipment are vital for rapid response in emergency situations.
Examining Carbon Monoxide and Propane Detectors
Toxic gases are a silent threat in RVs; thus, having working detectors is crucial:
- Operational Check: Test each detector with test buttons or approved test kits to ensure functionality.
- Signs for Replacement: Look for expiration dates, and replace detectors that produce false alarms frequently or show error signals.
Keeping these detectors in working order can be lifesaving, detecting invisible threats and providing crucial reaction time.
By thoroughly checking and updating your RV’s safety devices, you not only comply with safety regulations but also secure a safer traveling environment for everyone on board. Furthermore, these preventative measures help avoid potential disasters, allowing you to focus on enjoying your journey. Remember, a well-prepared RV is the foundation of any memorable and worry-free adventure.
5. Testing RV Appliances and Systems
Ensuring that your RV’s appliances and systems are in peak operating condition is crucial before embarking on your journey. This not only guarantees comfort but also prevents potential issues while on the road. Let’s walk through the essential steps to thoroughly test your RV’s appliances and electrical systems, ensuring they’re ready for whatever your adventure throws at them.
Initial Steps to Test RV Appliances
Before powering up your RV’s appliances, a few preliminary checks are necessary to ensure safety and functionality:
- Visual Inspection: Look for any obvious signs of damage or wear.
- Check Connections: Ensure all appliances are properly connected and secure.
- Safety Precautions: Confirm that your RV smoke detectors and carbon monoxide detectors are working, as these are crucial while operating gas-powered appliances.
Taking these initial steps helps prevent electrical mishaps and ensures your appliances run smoothly.
How to Efficiently Test Major Appliances
Testing the major appliances in your RV, such as the refrigerator, stove, and HVAC system, requires careful attention to detail:
- Refrigerator: Ensure it reaches and maintains the correct temperature settings, both on electricity and gas, if applicable.
- Stove: Check for even flame distribution and functioning safety features. Clean any blocked burners.
- HVAC System: Run the system to confirm it heats and cools effectively. Listen for unusual noises that could indicate a problem.
Identifying issues or potential malfunctions early can save time and money, keeping your trip on track.
Checking Electrical Outlets and Lighting
The integrity of your RV’s electrical system is fundamental for a safe trip. Here’s how to ensure all is well:
- Test All Outlets: Use a multimeter or a simple appliance to check each outlet for proper voltage.
- Inspect Wiring: Look for frayed wires or loose connections.
- Lighting Check: Turn on all lights to verify they are working and replace any burnt-out bulbs.
Properly functioning electrical systems and lighting are crucial for safety and convenience while traveling in your RV.
Thoroughly testing your RV’s appliances and electrical systems is not just a precaution; it’s a necessary step in preparing for a safe journey. Furthermore, addressing these systems in advance allows you to enjoy your travels with the assurance that your RV is as ready as you are. Remember, the time invested in these checks ensures peace of mind as you explore the open roads.
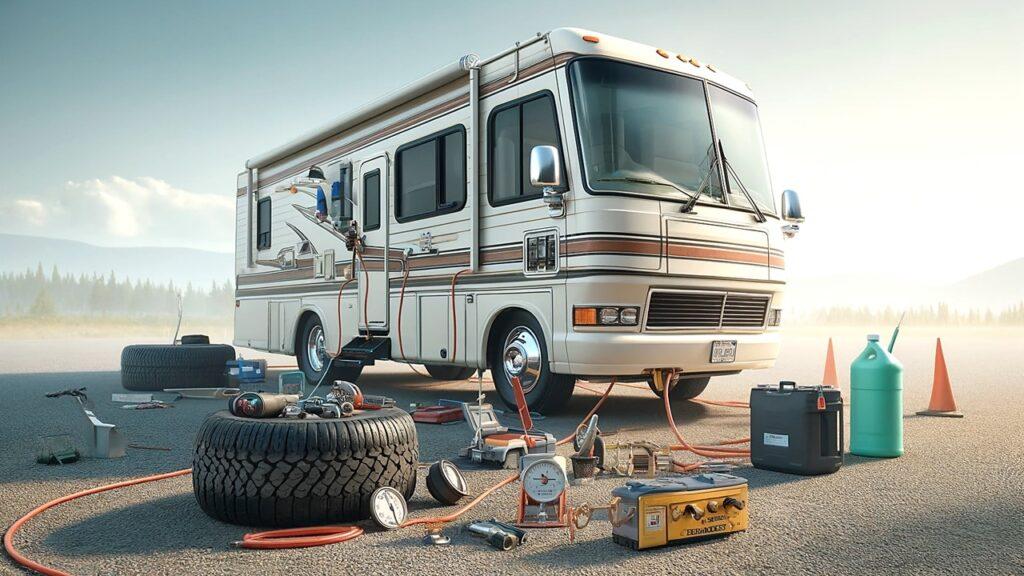
6. Inspecting and Maintaining RV Tires
Preparing your RV for spring adventures means starting from the ground up with thorough tire maintenance. Good tire health is essential not only for safety but also for the overall performance of your vehicle on those long scenic drives. Ensuring your tires are well-maintained will help avoid unexpected issues and guarantee a smoother ride.
The Critical Importance of Tire Maintenance
As you bring your RV out of winter storage, it’s crucial to examine each tire for signs of wear or damage. Tire integrity is a major safety concern—cracks or flat spots from sitting idle can lead to dangerous blowouts on the road. A comprehensive check ensures these problems are caught and addressed early, safeguarding your upcoming travels.
Checking Tire Pressure and Tread Depth
Proper tire pressure is foundational for safe and efficient RV travel. Begin by checking that each tire is inflated to the manufacturer’s recommended pressure level. This not only helps prevent tire failure but also optimizes fuel efficiency and minimizes wear. Following pressure checks, closely inspect the tread depth. Adequate tread is necessary for maintaining traction in wet conditions, and uneven wear might suggest alignment issues. Regular monitoring and maintenance of tire pressure and tread keep your RV agile and safe on any terrain.
Comprehensive Wheel and Axle Inspections
Beyond the tires, the wheels and axles deserve attention to ensure your RV’s handling remains reliable. Inspect axles for wear and ensure bearings are lubricated properly to prevent overheating and undue strain on the wheel assembly. Proper care of these components prevents future complications, enhances vehicle stability, and extends the life of your tires.
Investing time in inspecting and maintaining your RV’s tires before hitting the road this spring is essential for a safe journey. These precautions not only maintain the structural integrity of your vehicle but also enhance your driving experience, allowing you to enjoy your travels without worry. Regular tire maintenance is a proactive step that pays off, ensuring your RV is ready to take on the miles ahead with confidence.
7. Ensuring Efficient RV Generator Performance
As you ready your RV for upcoming travels, ensuring your generator is in optimal condition is key to a smooth and comfortable journey. The generator is the heart of your RV’s electrical system, providing power to your appliances and comforts while off-grid. Let’s dive into the necessary steps to ensure your RV’s generator is reliable and ready to perform efficiently.
Preparing Your RV’s Generator After Winter
After a season of storage, it’s essential to thoroughly inspect and prepare your RV’s generator for use. Start by checking for any signs of physical damage or corrosion that might have occurred during the off-season. Ensuring a clean power supply begins with cleaning or replacing air and fuel filters and checking oil levels. These initial steps are crucial for preventing operational issues and ensuring your generator provides a stable and reliable power supply.
Running a Full Generator Test
Once the basic maintenance checks are completed, conducting a comprehensive test of the generator is next. This involves running the generator under load, which means powering actual appliances and systems as you would during a typical use scenario. Monitor for any unusual noises, vibrations, or interruptions in power output. This process helps identify any underlying issues that could impact performance, such as faulty wiring or worn components. Addressing these issues now can prevent breakdowns during your trip.
Maintaining Your Generator
Routine maintenance is essential for the longevity and efficiency of your RV’s generator. Regularly scheduled oil changes, filter replacements, and system checks can greatly extend the life of your generator. Keep an eye on the exhaust system for any signs of blockage or wear, which can affect performance. Additionally, it’s important to know when to seek professional help. Complex issues such as electrical faults or mechanical failures should be addressed by a certified technician to ensure safe and correct repairs.
Taking proactive steps to ensure your RV’s generator is well-maintained and efficiently running is an investment in the quality of your travel experiences. Furthermore, keeping up with routine checks and addressing issues promptly not only enhances your on-the-road comfort but also prevents inconvenient and potentially costly repairs. Remember, a reliable generator means you can enjoy all the amenities of your RV, no matter where your adventures take you.
8. Updating RV Documentation and Registrations
Before hitting the road for your next RV adventure, ensuring that all documentation and registrations are up to date is as crucial as preparing your vehicle itself. Proper management of these essential elements not only keeps you compliant with the law but also smooths out any potential administrative hurdles during your travels. Let’s explore the necessary steps to keep your RV’s paperwork in perfect order.
Which Documents Need Review?
Keeping your RV’s essential documents updated is key to a hassle-free journey. This includes the RV’s registration, insurance policies, and any special permits required for your planned route or destinations. Updated documents ensure compliance with varying regional laws and facilitate quicker resolutions at checkpoints or in emergencies. Regular reviews of these documents can prevent unexpected complications that could disrupt your travel plans.
How to Update Your RV’s Documentation
Updating your RV’s documentation should be a proactive and systematic process:
- Start by gathering all current documentation and reviewing each for validity and expiration dates.
- Renew any documents that are due to expire soon. Many states and insurance providers offer online renewal services that can save time.
- Safely store your documents in a secure, easily accessible place within your RV. Consider using a fireproof lockbox for physical copies and create digital backups stored in a secure cloud service for added safety and accessibility.
This approach not only keeps your documents up to date but also ensures that they are handy when you need them, whether for routine verification or in an emergency.
Preparing for Legal Requirements on the Road
Navigating the legal requirements for RV travel can be complex, especially with state-specific variations in registration and insurance rules. Understanding these requirements is essential for ensuring that your travel across state lines is smooth and uninterrupted:
- Prior to your trip, research the registration and insurance requirements for each state you will visit, noting any special provisions for RVs.
- If necessary, obtain additional permits if your route includes areas with specific restrictions or requirements for RVs.
By preparing for these legal requirements in advance, you can avoid the pitfalls of non-compliance, such as fines or being unable to enter certain jurisdictions, which could significantly disrupt your travel plans.
Thorough preparation of your RV’s documentation and registrations is crucial for a seamless travel experience. By ensuring that all paperwork is current, safely stored, and in compliance with the laws of the areas you will visit, you set the stage for a journey that is as free from administrative hassles as possible. Remember, the time invested in preparing your RV’s documentation is well spent, as it contributes to a safe, enjoyable, and uninterrupted adventure on the open roads.
9. Cleaning and Preparing the RV Interior
After a long winter, giving your RV a thorough cleaning and reorganization not only revitalizes its space but also enhances your living experience during travels. This step is as crucial as any mechanical maintenance, ensuring that your home on wheels is not just functional but also welcoming and efficient. Let’s explore the best practices for deep cleaning, organizing, and setting up your RV’s interior for a season of adventure.
Deep Cleaning Your RV’s Interior
Post-winter cleaning is essential to remove dust, mold, or mildew that might have accumulated during the off-season. Start with a deep clean of all surfaces, using high-quality cleaning products suitable for the materials found in your RV. Vacuuming upholstery, washing textiles, and cleaning windows not only improve the air quality but also give your RV a fresh, inviting look. Pay special attention to the kitchen and bathroom areas, as these require sanitization to prevent the spread of bacteria and ensure a healthy environment.
Organizing and De-cluttering the RV Space
Efficient space management in an RV is key to making your travels comfortable and stress-free. Begin by decluttering, removing items you don’t need or that have accumulated over time. Utilize smart storage solutions such as multi-use furniture and organizational compartments that help maximize both living and storage space. Strategies such as using vertical space for storage and having designated areas for essential items can greatly enhance the functionality and spaciousness of your RV.
Setting Up the Interior for Comfortable Living
Arranging your RV’s interior for comfort and usability involves more than just aesthetic appeal; it’s about creating a functional living space that suits your travel lifestyle. Place furniture and amenities in a way that allows easy movement and effective use of space. Include essential items like comfortable bedding, functional kitchen tools, and efficient lighting to make daily activities effortless. Consider the layout of your sleeping, dining, and relaxation areas to ensure they meet your needs for comfort and convenience on the road.
Taking the time to thoroughly clean, organize, and prepare your RV’s interior sets the tone for a pleasant and efficient travel experience. Furthermore, maintaining a clean and well-organized RV not only enhances your comfort but also helps preserve the vehicle’s value and longevity. As you embark on your travels, you’ll appreciate the peace of mind that comes from knowing your living space is as ready for the journey as you are. This preparation ensures that no matter where the road takes you, your RV feels like a home away from home.
10. Preparing for Pest Control in Your RV
As you ready your RV for the open road, addressing potential pest issues is essential for maintaining a clean and healthy living environment. Pests not only pose health risks but can also cause significant damage to your vehicle. Understanding how to effectively manage pest control can save you from discomfort and costly repairs. Let’s delve into why pest control is crucial, how to inspect for pests, and the best preventative measures to keep your RV pest-free.
Why Pest Control is Crucial
After winter storage, it’s not uncommon to find that pests have made a home in your RV. Common culprits include mice, ants, spiders, and even larger rodents, all of which can carry diseases and compromise the cleanliness of your space. The health risks associated with these pests make it imperative to address any infestations before you begin your travels. Ensuring your RV is pest-free is not just about comfort—it’s about protecting your health and preserving the integrity of your RV’s interior.
How to Inspect for Pests
Inspecting your RV for pests involves a few critical steps:
- Visual Inspection: Check for signs of pest activity, such as droppings, nests, or damage to interior surfaces.
- Identify Entry Points: Look for gaps or holes in the RV’s exterior that could serve as entry points for pests. Sealing these can prevent further infestation.
- DIY Solutions: Use traps and natural repellents to manage minor pest issues. For ants and spiders, consider safe, non-toxic sprays that won’t harm your RV’s interior.
If you discover signs of severe infestation, such as damage to electrical wiring or large nests, it’s wise to call in pest control professionals who can manage the situation effectively and safely.
Preventative Measures for Pest Control
Maintaining a pest-free RV requires ongoing preventative strategies:
- Regular Cleaning: Keep your RV clean and free of food debris to avoid attracting pests.
- Proper Storage: Use sealed containers for food and dispose of waste properly.
- Regular Inspections: Especially after periods of storage, routinely check and clean your RV.
Implementing these practices can drastically reduce the likelihood of pest infestations, ensuring your living space remains comfortable and hygienic.
Proactive pest control is a critical aspect of RV maintenance. By understanding the risks and implementing both reactive measures and preventative strategies, you can ensure that your RV remains a safe and pleasant environment for all your travels. Furthermore, regular maintenance and vigilance can prevent pests from becoming a recurring problem, allowing you to focus on enjoying your adventures without unwelcome distractions. Remember, a clean RV is your best defense against pests, making regular inspections and cleaning a key routine before, during, and after your trips.
11. Planning Your First Post-Winter RV Trip
As the winter thaws and the open road beckons, planning your first RV trip of the season is an exciting prospect. This journey is not just about exploring new destinations but also about ensuring your RV is ready to roll after months of storage. Here’s a guide to selecting your destination, preparing your RV for departure, and ensuring a journey that’s both safe and enjoyable.
Selecting Your Destination
Choosing the perfect spot for your spring adventure requires careful consideration. Think about the climate of potential destinations, as some areas may still be emerging from winter’s chill. Accessibility of campgrounds and the availability of amenities should also play a significant role in your decision-making. Popular choices for RVers often include national parks, beachfront campsites, or tranquil desert landscapes, each offering unique experiences and natural beauty ideal for a spring getaway.
Preparing Your RV for the Trip
Ensuring your RV is prepared for the trip is crucial for a smooth experience. Start with a comprehensive checklist that covers engine health, tire pressure, battery function, and fluid levels. It’s essential to check the interior for any issues like mold, mildew, or pest invasions that could have developed during winter storage. Address any discovered issues well before your departure date to avoid last-minute hassles, making sure everything from appliances to your HVAC system is operational.
Ensuring a Smooth Journey
To guarantee a safe and pleasant drive, refreshing your RV driving skills and understanding potential road challenges are essential. Review tips for managing large vehicles—how to handle your RV during windy conditions or when driving through mountainous areas is critical. Plan your route in advance, noting key locations for stops, potential RV service centers, and emergency exit routes. Ensuring your RV is equipped with necessary safety tools, such as a current first-aid kit and emergency roadside equipment, is also crucial.
Kicking off your travel season with a well-planned RV trip can rejuvenate both you and your vehicle. By carefully selecting your destination, rigorously preparing your RV, and planning for all aspects of your journey, you’re setting the stage for a memorable adventure. Thorough preparation not only enhances your travel experience but also ensures that your reintroduction to the nomadic lifestyle is as seamless and joyful as possible.
Helpful Tips for Dewinterizing Your RV
As the seasons change and you prepare to bring your RV out of winter storage, a thorough dewinterization process is crucial to ensure your vehicle is safe, functional, and ready for the road. Dewinterizing your RV effectively can prevent costly repairs and ensure a smooth start to your traveling season. Here are some essential tips to guide you through this crucial maintenance phase, ensuring your RV operates at its best from day one.
General Tips to Enhance the Dewinterization Process
To start the dewinterization process effectively, focus on a comprehensive check of your RV’s systems. This includes draining and flushing the antifreeze from the plumbing, checking all appliances for operational integrity, and inspecting the battery and electrical systems. Make sure to clean and sanitize the water system thoroughly to prevent any bacteria or mold that could have developed during storage. Additionally, lubricate hinges, locks, and sliders to ensure everything moves smoothly.
Quick Checks Before Each Trip
Before you head out on any trip, conducting quick, routine checks can save you a lot of trouble on the road. Check your tire pressures and tread for wear and ensure all lights and signals are functional. Verify that your fire extinguisher, smoke alarms, and carbon monoxide detectors are in working order. A quick review of your RV’s fluid levels, including oil, brake fluid, and coolant, is also essential. These checks, while brief, are crucial in maintaining the safety and functionality of your RV.
Seasonal Maintenance Reminders
Regular maintenance is key to the longevity and reliability of your RV. As each season changes, it’s a good practice to perform specific maintenance tasks. For instance, before the summer, ensure your air conditioning system is serviced. Similarly, before winter sets in, make sure your RV is properly winterized to prevent any freezing damage. Keeping a seasonal maintenance calendar can help remind you of these critical tasks, ensuring that your RV remains in top condition year-round.
Following these guidelines for dewinterizing and maintaining your RV not only prepares it for the upcoming travel season but also extends its life and enhances your overall travel experience. Furthermore, these proactive steps ensure that your adventures are safe and enjoyable, free from unexpected mechanical issues. Remember, the time spent preparing your RV for the road reflects directly in the quality of your travels, making these efforts well worth the investment.
Wrapping It Up!
As we conclude our guide on “Detailed Easy Steps to Dewinterize Your RV,” it’s important to revisit the essential steps that ensure your RV is ready for another season of adventures. From checking the integrity of your RV tires and ensuring the generator operates efficiently, to updating necessary documentation and optimizing your interior space, each task plays a pivotal role in transitioning your vehicle from winter storage to travel readiness.
Embark on your upcoming travel season with enthusiasm and confidence, knowing that your RV is prepared to take you anywhere. The freedom and joy that come with RV travel are unparalleled, as each journey brings new landscapes and experiences right to your doorstep. Treat each trip as an opportunity to create lasting memories, supported by the assurance that your RV is in excellent condition.
Moreover, remember that maintaining your RV is an ongoing commitment. Regular maintenance, including checks on your RV’s air conditioners, safety devices, and plumbing systems, is crucial for smooth operation. Staying proactive with these tasks not only extends the life of your RV but also guarantees safer and more enjoyable travels.
Related FAQs
What Are the First Steps to Dewinterize My RV?
Begin by checking and recharging the RV battery and inspecting for any pest infestations.
How Do I Sanitize My RV’s Water System?
Flush the system with a bleach solution, then rinse thoroughly to ensure cleanliness.
What Should I Check on My RV Before Hitting the Road?
Inspect tires for pressure and wear, test all appliances, and ensure safety devices are functional.
How Often Should I Dewinterize My RV?
Dewinterize your RV annually at the beginning of each travel season to maintain optimal performance.
Can I Dewinterize My RV Myself?
Yes, most RV owners can perform dewinterization themselves by following detailed step-by-step guides.
As outdoor enthusiasts ourselves, we understand the significance of reliable gear that can withstand the elements and support you throughout your journey. We try to provide as much real life information with our guides and how tos to the readers as possible. Our honest and transparent reviews of essential outdoor gadgets and products are rooted in testing and experience. We take great satisfaction in offering unbiased evaluations, ensuring that you can make informed decisions when investing in outdoor gear. As an affiliate website, we may earn a small commission from some of the products we feature. However, rest assured that our opinions are not influenced by this, and your trust is always our top priority.