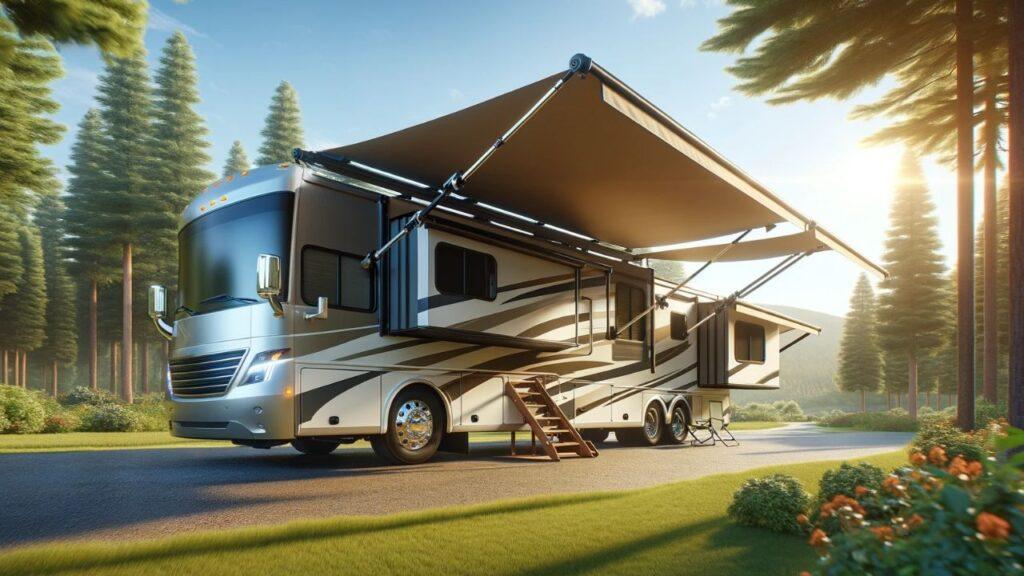
Whether you’re embarking on a cross-country journey or settling into a cozy campground, an RV trip is your ticket to summer adventures. A retractable awning is the perfect companion to elevate your experience, providing both comfort and functionality. It shields you from harsh weather, expands your living space, and creates a welcoming outdoor area for lounging and dining. In this guide to installing a retractable awning on an RV, you’ll find everything needed for a smooth installation process. Furthermore, a retractable awning enhances your RV’s value and makes your travels more convenient. Moreover, it adds flexibility, allowing you to seamlessly transition between indoor and outdoor living. Make the most of your summer by enhancing your RV’s capabilities, making each trip more comfortable and enjoyable.
Types of Retractable Awnings for RV
When installing a retractable awning on an RV, choosing the right type is crucial. Manual and motorized awnings are the primary options, each offering distinct benefits. A manual awning operates by a hand crank, making it a budget-friendly choice. It’s simple to use, but it requires physical effort to deploy and retract. On the other hand, motorized awnings provide automated convenience, operated by a switch or remote control, though they tend to be more expensive.
Furthermore, the material of your awning affects its durability, weight, and overall appearance. Acrylic and vinyl are popular choices, offering unique benefits. Acrylic awnings are breathable, allowing air to circulate while repelling moisture. They’re lightweight and resistant to fading, making them suitable for long-term use. Vinyl awnings are heavier and more affordable, offering excellent waterproof protection. However, they may require more maintenance to prevent mildew buildup.
Overall, your choice between a manual or motorized awning, along with the material, depends on your travel needs and budget. Consider how frequently you travel and the environments you encounter. This helps ensure that your RV awnings function optimally, enhancing your RV experience. Additionally, materials like acrylic and vinyl offer varying levels of durability, adding further flexibility.
Sizing Your Awning to Fit Your RV
Choosing the right size is essential when installing a retractable awning on an RV. Begin by measuring the length of your RV’s side where the awning will be attached. This measurement helps you select an awning that covers the area adequately. Consider the awning’s width and projection, ensuring full coverage for maximum comfort.
Furthermore, compatibility is key to a smooth installation process. Make sure the awning’s mounting brackets align with your RV’s structure, allowing for secure attachment. This ensures a sturdy fit, even in windy conditions. Additionally, check that your chosen awning extends smoothly and retracts without obstruction.
Ensure your awning complements your RV’s design, blending seamlessly with its aesthetics. This contributes to a cohesive look while enhancing functionality. Taking time to measure and consider these factors guarantees a seamless installation, making your RV trips more enjoyable.
Necessary Tools and Materials Needed for Retractable Awnings Installation
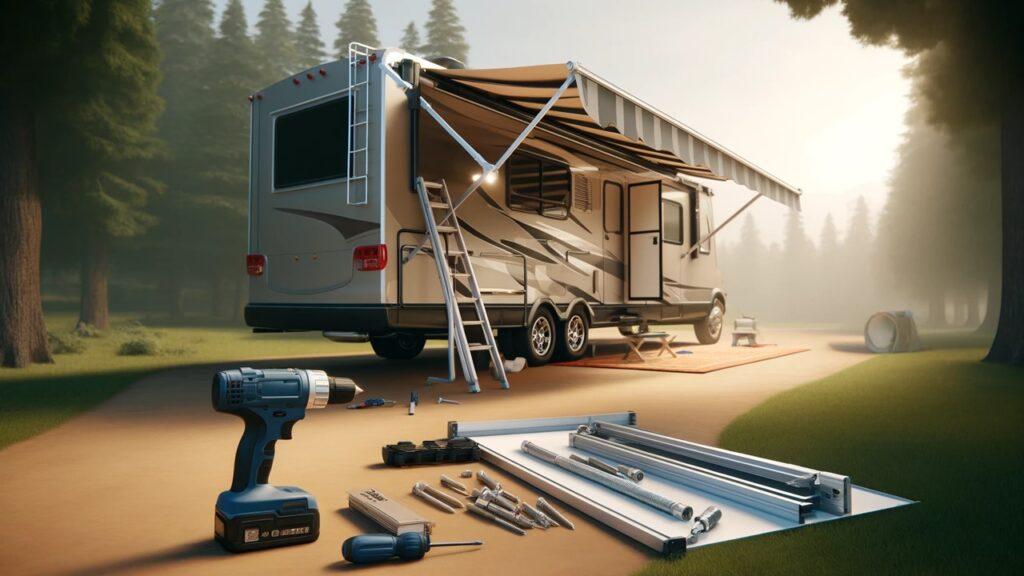
To successfully install a retractable awning on an RV, gather all necessary tools and materials. Standard tools include a power drill, measuring tape, level, and wrench set. These help ensure proper attachment and alignment, allowing for secure installation. Additionally, a ladder may be needed to reach higher points on your RV, facilitating proper mounting.
Beyond the tools, materials such as screws and brackets are essential. Ensure these components are compatible with your RV’s structure and the awning kit. This provides secure mounting points, preventing dislodging during travel.
Once you’ve gathered the tools and materials, double-check that they meet your needs. This avoids delays and complications, making the installation smoother. Additionally, consider internal improvements like installing RV power inverters or RV converter chargers for motorized awnings, which enhance your RV’s functionality.
After acquiring the necessary tools and materials, you’re ready to install the awning, enjoying increased comfort and versatility on your travels.
Preparing Your RV for Installation
Before embarking on the journey of installing a retractable awning on your RV, proper preparation is essential. This ensures a smooth installation process, minimizing potential setbacks. Preparing your RV involves considering both safety measures and identifying key installation points.
Safety First: Precautions Before Starting
Safety should be the foremost priority when installing a retractable awning. Begin by checking the weather for your area. Clear, calm conditions are ideal for installation, minimizing the risk of accidents from wind or rain. Additionally, ensure your RV is parked on a stable, level surface, preventing unintended movement.
Moreover, secure your RV’s parking brake and use wheel chocks to prevent rolling. This provides a stable platform for installing the awning. Additionally, consider wearing appropriate safety gear, including gloves and protective eyewear. This protects you from potential injuries during the installation process.
Furthermore, keep children and pets away from the work area, preventing distractions and ensuring everyone’s safety. Clear communication with any helpers involved in the installation is crucial, establishing clear roles and preventing confusion.
Identifying Installation Points on Your RV
Next, identifying suitable installation points is key to installing a retractable awning on an RV. Begin by inspecting the RV’s side, focusing on areas where the awning can be securely mounted. Avoid spots with significant curves or obstructions that could hinder installation or operation.
Moreover, ensure the chosen mounting points are structurally sound, capable of supporting the awning’s weight. This prevents damage to both the awning and your RV over time. Additionally, take note of the placement of doors, windows, and other fixtures, ensuring the awning’s deployment doesn’t obstruct their function.
Once identified, clean the chosen areas thoroughly, removing dirt and debris. This ensures the brackets adhere securely, preventing them from loosening over time. Additionally, dry the area completely before proceeding with the installation to avoid moisture-related issues.
After addressing these preparations, the installation process will flow smoothly. This ensures the retractable awning enhances your RV’s functionality, providing comfort on every trip.
Preparing your RV for a retractable awning installation involves safety measures and identifying secure mounting points. This guarantees a successful installation, enhancing your RV experience. Remember, preparation is key, allowing you to enjoy your travels with greater ease and comfort.
Step-by-Step Guide to Installing Your Retractable Awning
Installing a retractable awning on your RV can transform your travel experience, adding comfort, convenience, and versatility. This guide breaks down the process into clear, manageable steps, ensuring a successful installation that enhances your RV adventures.
Step 1: Preparing the Awning and RV
Before you begin, gather all necessary parts and tools. Lay them out, checking against the manufacturer’s guide to ensure nothing is missing. Then, assemble the awning frame, connecting its components securely. Ensure the joints and brackets are tight, creating a stable foundation for the awning.
Next, measure the side of your RV where the awning will be mounted. Note its length and height, ensuring the awning will cover the intended area. Then, clean the area thoroughly, removing dirt, grime, and debris. This creates a smooth surface, ensuring secure bracket adhesion.
Moreover, double-check that the RV is parked on level ground, with its parking brake engaged and wheel chocks in place. This ensures stability during installation, preventing unintended movement. Additionally, wear gloves and protective eyewear, safeguarding yourself against potential injuries.
Step 2: Attaching the Mounting Brackets
Once prepared, identify secure points for mounting brackets. Avoid placing brackets near curves, windows, or other obstructions. Position the brackets at even intervals along the RV’s side, ensuring they align with the awning frame.
Drill holes for each bracket, then secure them with screws. Tighten them thoroughly, preventing movement or shifting. Furthermore, double-check the brackets’ levelness, ensuring the awning’s frame aligns evenly. This prevents future issues during deployment or retraction.
Step 3: Securing the Awning to the Brackets
With the brackets in place, lift the awning frame and attach it securely. Ensure it snaps into place evenly, avoiding uneven weight distribution. Test its stability, gently tugging at various points to ensure secure attachment.
Deploy and retract the awning multiple times, checking for smooth operation. If issues arise, make adjustments to the frame or brackets, ensuring even extension. This prevents future complications and ensures seamless deployment.
Step 4: Installing the Retraction Mechanism
For motorized awnings, connect the retraction mechanism to your RV’s electrical system. Follow the manufacturer’s instructions closely, avoiding wiring errors. Ensure the power source is adequate, preventing power surges or outages.
Once connected, test the mechanism, deploying and retracting the awning multiple times. Check for smooth, automated movement, making adjustments as needed. This confirms the installation is complete and functional.
For manual awnings, attach the retraction mechanism, securing it tightly to the frame. Test its operation, ensuring smooth deployment and retraction with minimal effort. Adjust as necessary, ensuring consistent, reliable movement.
Step 5: Final Adjustments and Testing
After installing the awning, test it thoroughly. Deploy and retract it multiple times, ensuring consistent operation. Check for wobbling or instability, tightening brackets or adjusting the frame as needed.
Additionally, ensure the awning’s fabric or material extends smoothly, avoiding tears or bunching. This confirms the awning is ready for use, providing comfort and protection on your travels.
Moreover, take time to clean the awning’s frame and material, removing any installation residue. This prevents buildup over time, maintaining the awning’s appearance and functionality.
Installing a retractable awning on your RV involves careful preparation, secure attachment, and thorough testing. Following these steps ensures a successful installation, enhancing your RV’s comfort and functionality. Taking time to prepare, attach securely, and test thoroughly makes your RV experience more enjoyable and convenient. This step-by-step guide simplifies the process, helping you install your awning seamlessly.
Testing and Adjusting Your New Awning
After installing your retractable awning, it’s essential to test and adjust it to ensure smooth operation. This not only guarantees functionality but also protects your RV and awning from potential damage.
Steps for Safely Deploying and Retracting the Awning the First Time
To begin, ensure your RV is parked on a flat, stable surface. This minimizes any tilting or shifting that could affect the awning’s deployment. Next, extend the awning fully, paying attention to how it unfolds. Check for any sticking points or unusual sounds, indicating potential mechanical issues.
After extending it fully, retract the awning slowly. Watch for any uneven movement, making necessary adjustments to the frame or brackets. This guarantees smooth operation, preventing future complications.
Moreover, consider repeating this process multiple times, observing for consistency. This helps identify any persistent issues, allowing for timely adjustments.
Tips on Making Adjustments to Ensure Smooth Operation
If you notice any uneven deployment or retraction, inspect the brackets and frame for looseness. Tighten any loose components, preventing further instability. Additionally, check the fabric for snags or tears, which can hinder smooth extension. Repair or replace damaged sections, ensuring smooth operation.
Thorough testing and adjustments are crucial for maintaining your awning’s functionality. Taking time to deploy and retract the awning multiple times, observing for smooth operation, and making necessary adjustments ensures a reliable and enjoyable experience.
Maintenance Tips for Retractable RV Awnings
To ensure your retractable awning remains functional and durable, regular maintenance and care are essential. This section provides guidance on cleaning and caring for the awning fabric and mechanical parts, along with preparing it for different seasons and storage.
Regular Cleaning and Care
To begin, cleaning your awning regularly prevents dirt buildup, which can cause wear and tear over time. For fabric awnings, use a soft brush or cloth to remove loose dirt. Then, apply a mild soap solution, gently scrubbing to remove stains and grime. Rinse thoroughly with clean water, avoiding soap residue that could attract dirt.
For mechanical parts, inspect them for rust or debris buildup. Apply lubricants to hinges, joints, and other moving parts, ensuring smooth operation. Avoid over-lubricating, which can attract dust and dirt.
Additionally, check the fabric for tears or holes. Repair or patch any damage promptly, preventing it from worsening. This maintains the awning’s appearance and extends its lifespan.
Seasonal Maintenance and Storage
Seasonal changes can impact your awning’s functionality and durability. In winter, retract the awning fully, protecting it from harsh weather conditions. Secure it with a cover or tarp, preventing moisture and ice buildup. This prevents damage to the fabric and mechanical parts, extending its lifespan.
In spring, inspect the awning thoroughly, checking for damage or wear from winter storage. Clean it thoroughly, removing any dust or dirt accumulated over time. Lubricate mechanical parts, ensuring smooth operation during deployment.
For long-term storage, retract the awning fully, securing it with a cover. Store it in a dry, cool place, protecting it from environmental damage. Regularly inspect it during storage, checking for any signs of wear or damage.
Regular maintenance and seasonal care ensure your retractable awning remains functional and durable. Cleaning and caring for the fabric and mechanical parts, along with proper storage, protects it from wear and extends its lifespan. This keeps your RV adventures comfortable and enjoyable.
Troubleshooting Common Issues
Even after a successful installation, retractable awnings on RVs can face common issues. This section addresses these problems, offering solutions to keep your awning functioning smoothly, enhancing your RV travels.
Mechanical Failures and Their Fixes
Mechanical failures are a common issue with retractable awnings, particularly with motorized models. If the awning refuses to extend or retract, start by checking the power source. Ensure the RV’s battery is charged, and the awning’s electrical connections are secure. Reconnect loose wires, and replace frayed ones to restore functionality.
Furthermore, inspect the motor for signs of wear or damage. If the motor overheats or struggles to move, it may need replacement. Alternatively, lubricate mechanical parts, including hinges and joints, to ensure smooth movement.
In manual awnings, check the hand crank mechanism for smooth operation. If it sticks or jams, lubricate the gears and joints. If problems persist, consider replacing worn parts, restoring the awning’s functionality.
Fabric Damage and Repairs
Fabric damage is another common issue, particularly in areas prone to harsh weather. If tears or holes appear, patch them promptly to prevent further damage. Use a fabric repair kit, ensuring the patch adheres securely. Smooth the edges to blend it seamlessly with the awning.
For severe damage, consider replacing the entire awning fabric. Contact the manufacturer or supplier for a replacement, ensuring compatibility. Remove the damaged fabric, carefully installing the new one, securing it firmly.
Moreover, to prevent future damage, retract the awning during strong winds or storms, reducing stress on the fabric. This preserves its longevity, ensuring continued use on your RV travels.
Mechanical failures and fabric damage are common issues with retractable awnings. Addressing these problems promptly, with solutions like rewiring, lubricating, patching, or replacing parts, ensures the awning remains functional and reliable, enhancing your RV trips.
Benefits of Retractable Awnings
A retractable awning offers numerous benefits, enhancing your RV’s functionality and comfort. These advantages make it a valuable addition to any RV setup.
Firstly, a retractable awning provides shade and protection from the elements, allowing you to enjoy outdoor activities comfortably. Whether lounging, dining, or entertaining, the awning creates a cozy, shaded space, shielding you from harsh sun or rain.
Furthermore, it extends your living space, creating a seamless transition between indoor and outdoor areas. This makes your RV feel more spacious, allowing for varied activities. It also reduces reliance on indoor facilities, helping maintain a clutter-free RV.
Additionally, retractable awnings are versatile, adapting to different travel needs. Manual models offer budget-friendly options, while motorized versions provide automated convenience. This flexibility makes it easy to find an awning that suits your RV and travel style.
In conclusion, retractable awnings offer comfort, versatility, and protection, making them an essential addition to any RV setup. This enhances your travels, creating enjoyable experiences and functional spaces.
Wrapping It Up!
A retractable awning offers numerous benefits, making it a valuable addition to any RV setup. This guide to installing a retractable awning on an RV covers the necessary steps, ensuring a successful installation that enhances your travels.
We’ve explored the types of awnings available, from manual to motorized models, along with different materials like acrylic and vinyl. These options cater to various budgets and needs, allowing for a personalized choice. Furthermore, sizing and compatibility ensure the awning fits seamlessly, preventing installation complications.
We’ve also covered the tools and materials needed, simplifying the process. Proper preparation, secure attachment, and thorough testing guarantee smooth operation. Additionally, troubleshooting common issues, including mechanical failures and fabric damage, helps maintain the awning’s functionality.
Furthermore, regular maintenance and seasonal care extend the awning’s lifespan, preserving its appearance and performance. This makes it a worthwhile investment, enhancing your RV experience.
A retractable awning offers comfort, protection, and versatility, creating enjoyable travel experiences. Following this guide simplifies the installation process, allowing for a seamless addition to your RV. This enhances your RV adventures, making them comfortable and enjoyable.
Related FAQs
Can Retractable Awnings Be Installed on Any RV?
Yes, most RVs can accommodate retractable awnings. Ensure the chosen model fits securely and aligns with your RV’s structure.
How Long Does Installation Take?
The installation process can take several hours, depending on the awning type and RV design. Preparations and adjustments may add time.
Do Retractable Awnings Require Maintenance?
Yes, regular cleaning, lubrication, and storage preparation are essential to maintain the awning’s durability and functionality.
Can I Operate a Retractable Awning Manually?
Yes, manual models operate by hand crank, while motorized versions offer automated options. Both provide convenience in different ways.
What’s the Average Lifespan of a Retractable Awning?
A well-maintained awning can last 10 years or more, depending on material quality, usage frequency, and environmental conditions.
As outdoor enthusiasts ourselves, we understand the significance of reliable gear that can withstand the elements and support you throughout your journey. We try to provide as much real life information with our guides and how tos to the readers as possible. Our honest and transparent reviews of essential outdoor gadgets and products are rooted in testing and experience. We take great satisfaction in offering unbiased evaluations, ensuring that you can make informed decisions when investing in outdoor gear. As an affiliate website, we may earn a small commission from some of the products we feature. However, rest assured that our opinions are not influenced by this, and your trust is always our top priority.